Manage Your Windows 10 Notifications With These Simple Steps
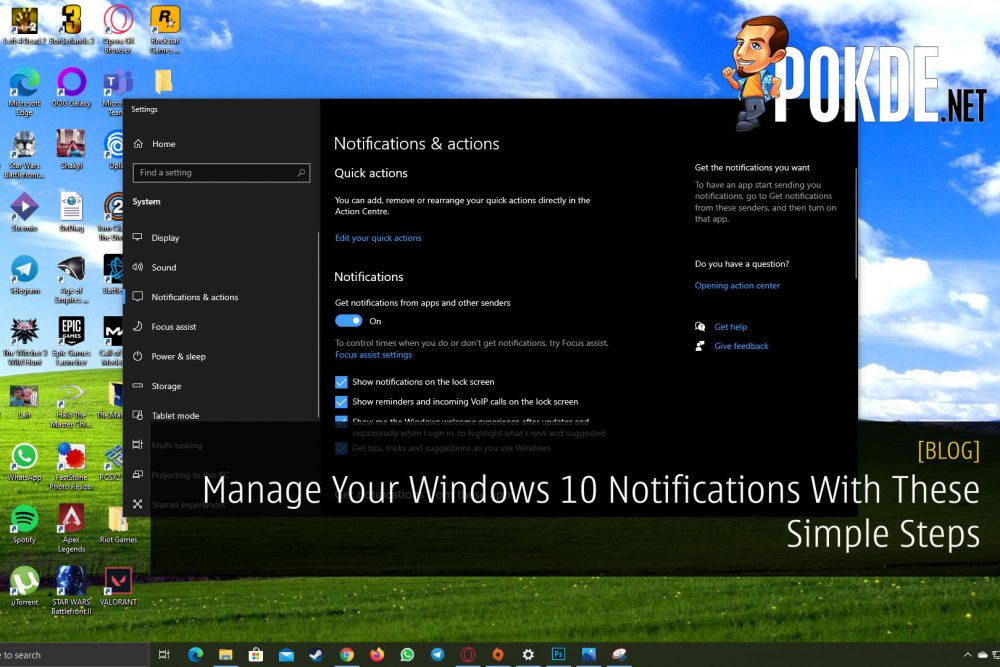
Notifications are undeniably useful. They remind you of upcoming events, deadlines and important dates in your life. There are times however, when notifications can become a bit too much and distracting especially when you’re super busy chasing that deadline for work or for school, when you’re watching a movie or even when you’re playing a game.
This is especially true on Windows 10 when you suddenly feel that the torrent of pop ups at the bottom of your screen just won’t stop. Luckily you can save yourself from going absolutely mad by disabling those notifications by following these simple steps.
Here’s how to disable notifications on Windows 10.
Disable Windows 10 Notifications
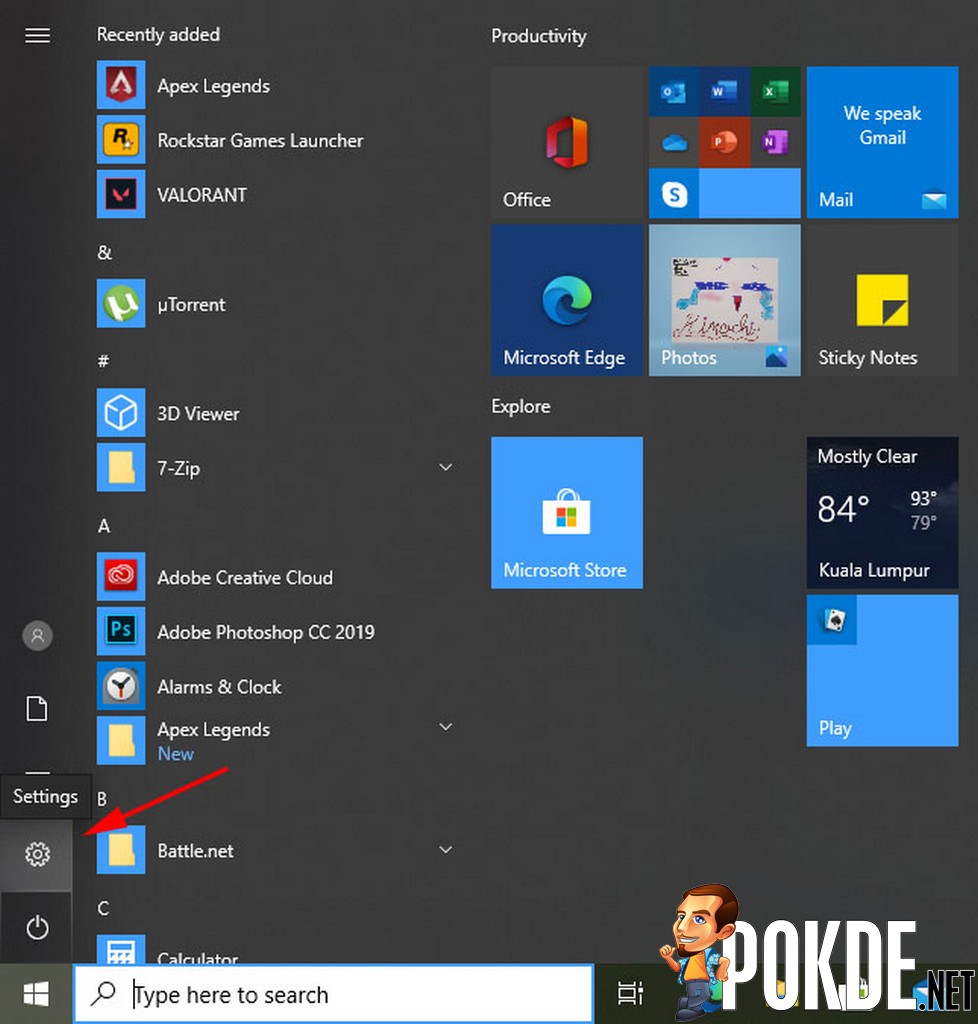
Step 1: Click on the Start button and select the Settings icon on bottom left side of your screen.
Step 2: Select the Systems icon in the Settings menu.
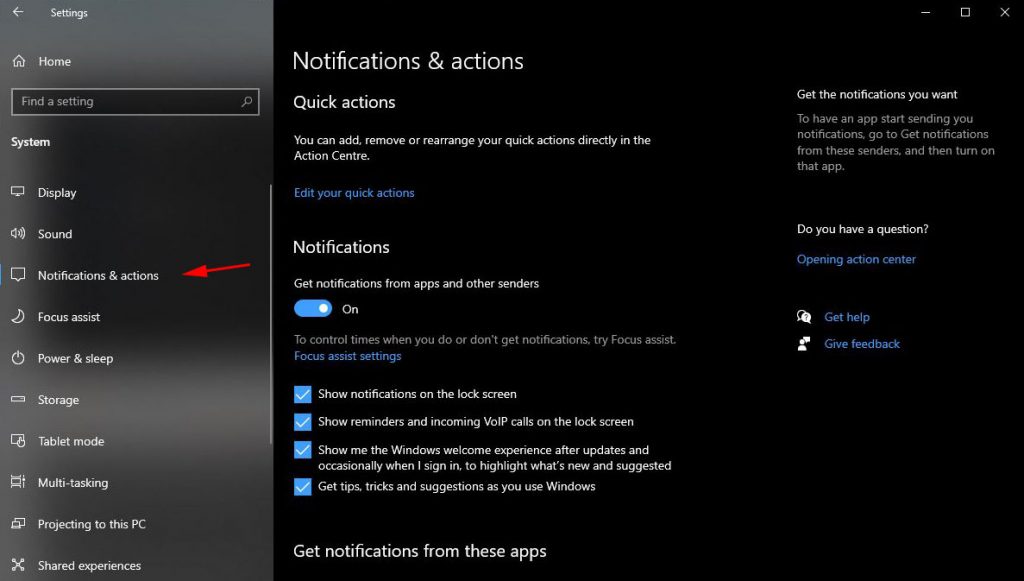
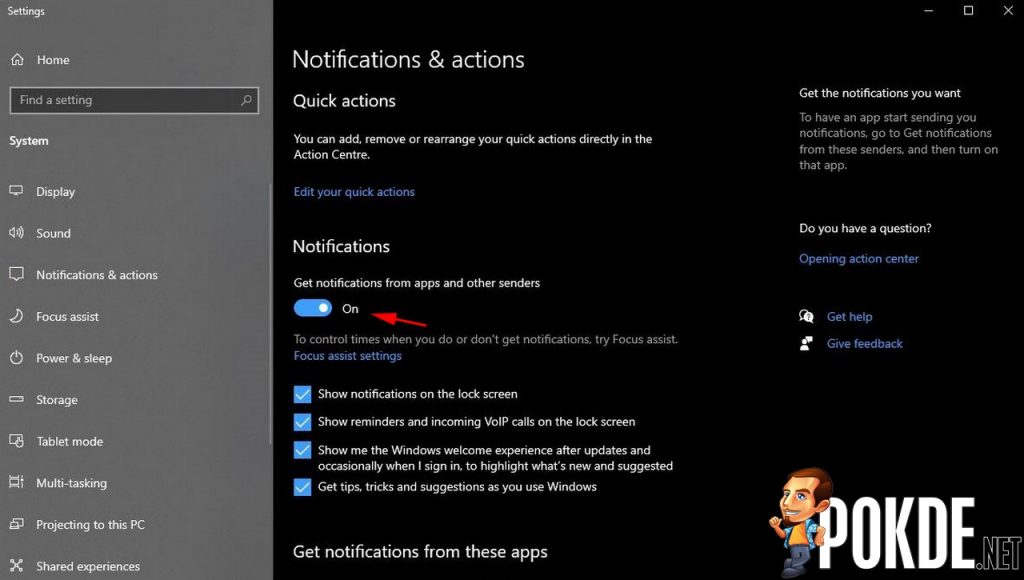
Step 3: Navigate to Notifications & Actions on the left hand side menu.
Step 4: Uncheck the “Get notifications from apps and other senders” option and you’re done.
Follow these steps and you can completely say goodbye to all your notifications from distracting you from whatever you’re currently doing. Of course you can always turn them back on if you want to. To do so you can follow the above steps but backwards.
But what if you want to just disable the sounds and keep the pop up notifications? I mean even though the pop ups are annoying but you don’t want to be totally in the dark of what’s happening around you right? Here’s how to do just that.
Disable Windows 10 Notification Sounds
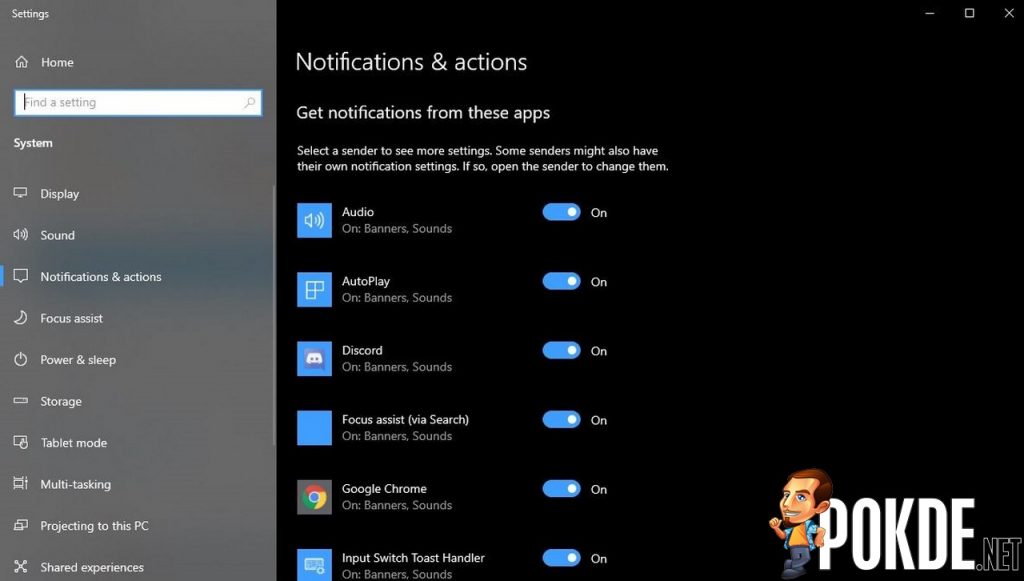
Step 1: In the Notifications & Actions menu, scroll down and select the apps you want to their sounds to be disabled.
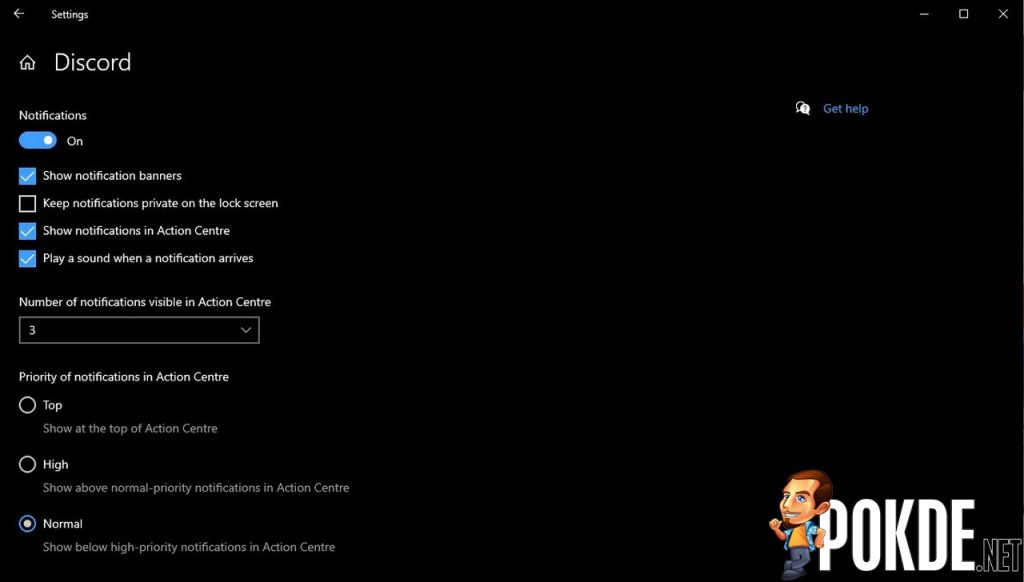
Step 2: Click on the selected app and uncheck the “Play a sound when a notification arrives” option.
Step 3: Repeat Step 2 with all your selected apps.
Another neat trick in managing your Windows 10 notifications is that you can actually schedule the times when you want your notifications to be disabled. It’s just as easy as the other steps above. Here’s how to do it.
Schedule Your Windows 10 Notifications
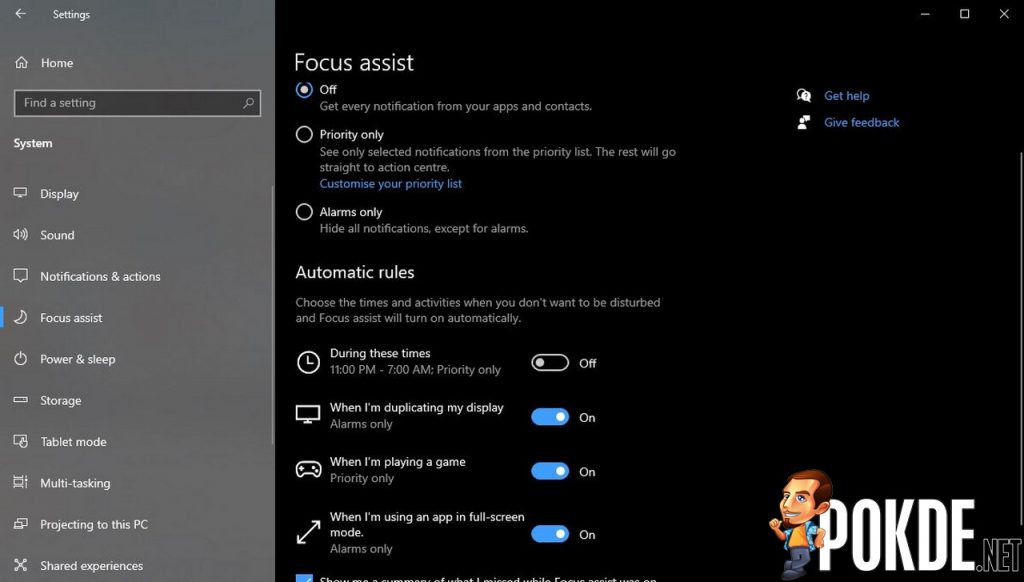
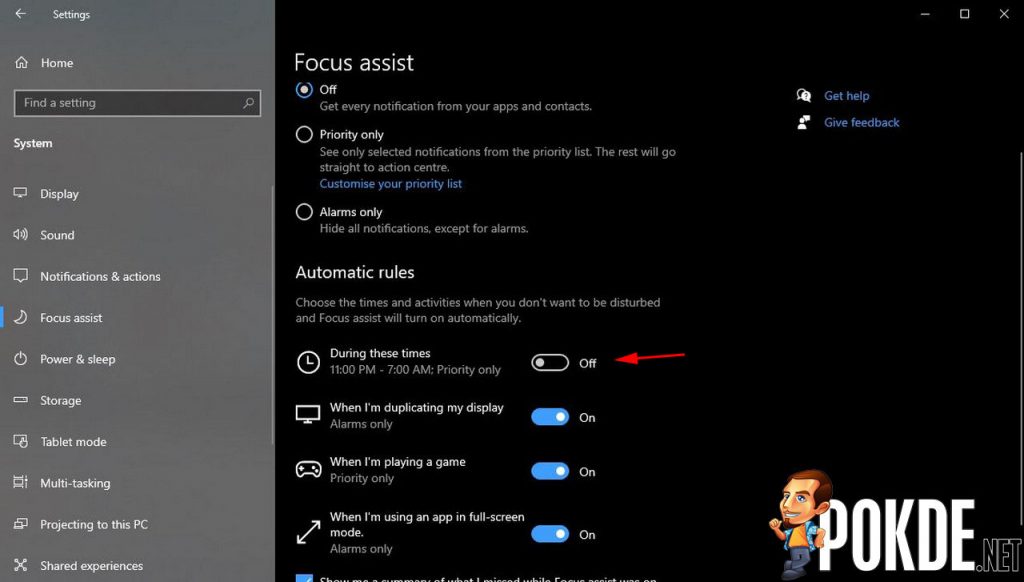
Step 1: Select Focus Assist under Notifications & Actions in the Systems left hand menu.
Step 2: Under “Automatic rules” select the “During these times” option.
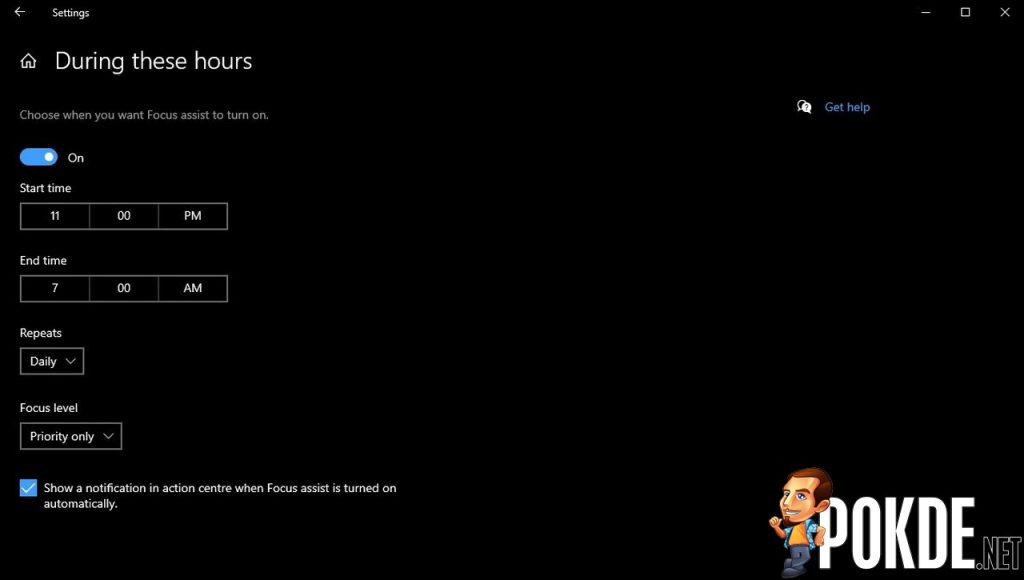
Step 3: Select “On” and configure the timing, repeats and priority level that you prefer.
Step 4: (Optional) Choose which other settings you want to check under the “Automatic rules”.
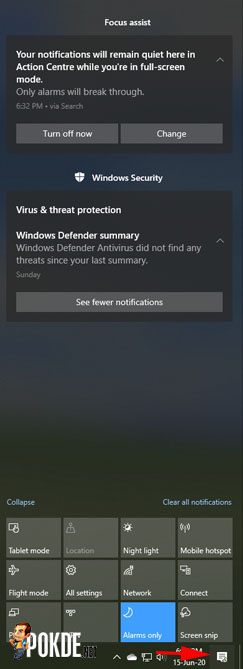
After you’ve enabled this, you will find your notifications tucked away in the hidden Focus Assist sidebar on the right. To access that all you have to do is just click the notifications button on the bottom left of your screen.
Simple right? I mean it’s just a matter of knowing where to look which we hope after our little guide above would be beneficial for you in the future. For more tips and tricks, check out article on disabling pop up ads on Google Chrome right here and how to skip YouTube ads right here.











Leave a Response