
Some photos start small and stay small until you actually need them bigger. A profile picture saved from a chat, a childhood portrait scanned years ago at 300 dpi, an image pulled from an old blog post that you want to reuse for a new banner. On a phone screen it looks okay. The moment you try to print it, crop into it, or place it full width on a website, it breaks into soft squares.
Making a small photo larger is not just about size. If you only stretch it, you also stretch the problems — blur gets bigger, compression blocks get bigger, and any small watermark or text in the corner becomes more obvious.
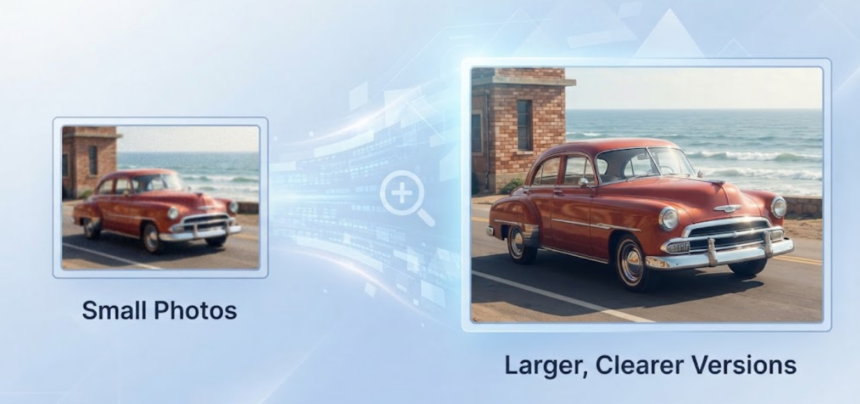
Rather than simply increasing its size, a cleaner way is to boost resolution and detail at once. This article explains how to turn small photos into larger, clearer versions that still look natural.
Clear the small marks that get magnified
Small photos almost always carry small marks. A free editor left a logo in the corner. A stock draft still has a faint watermark. An old phone adds a date stamp. You added a handle or emoji for a story and now want a clean version for a website.
On a small file those marks seem minor.
Once you double or triple the size, they become the first thing anyone notices.
Wink photo watermark remover can help clean up these distractions before the photo is enlarged. Wink is an AI-powered photo editing tool that helps with many common image problems, from unwanted marks to low resolution and soft details. Once those distractions are gone, the photo has a cleaner base for further edits such as upscaling and sharpening.



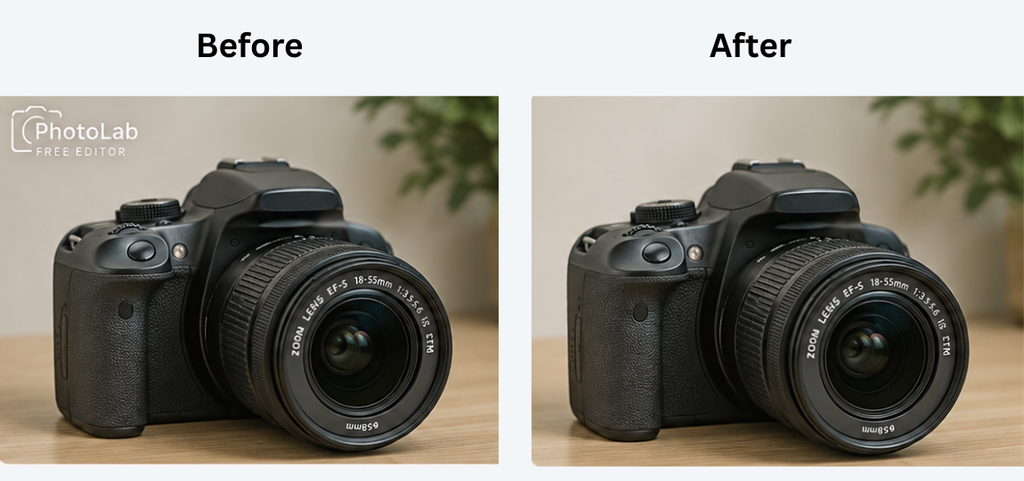
Instead of blurring the mark or leaving a smudge, its watermark remover fills in what was behind it — the texture of skin, the pattern in fabric, the blur in the background. It can auto-detect the watermark area, or you can manually paint it for tighter control.
Situations where this pre-clean matters a lot:
- Draft product photos that still have a collage app logo
- Screenshots of your own designs that include interface text
- Scanned prints with a lab stamp or handwritten note on the edge
- Repurposed social images where a previous caption or sticker sits over the subject
A good habit: remove marks at the original size, then enlarge. If you enlarge first and then remove, the mark is larger and the fill area is larger, which makes any small imperfection more visible.
Enlarge so it actually looks clearer, not just bigger
Traditional “Resize Image” in any editor just stretches pixels. A 600 x 600 photo made 2400 x 2400 the old way is just 4x bigger blur.
Modern AI enlarging works differently. It does two jobs at once:
- Resolution reconstruction: It predicts where new pixels should go between the old ones, using patterns learned from millions of sharp photos.
- Detail recovery: It restores edges, textures, and gradients that were lost to compression — hair strands, leaf edges, text on a product label, the grain of an old scan.
In Wink, the image upscaler handles that part. It increases the image resolution while working to keep important details sharp and natural. In other words, it becomes handy for pictures that have to be scaled up without any deformations.
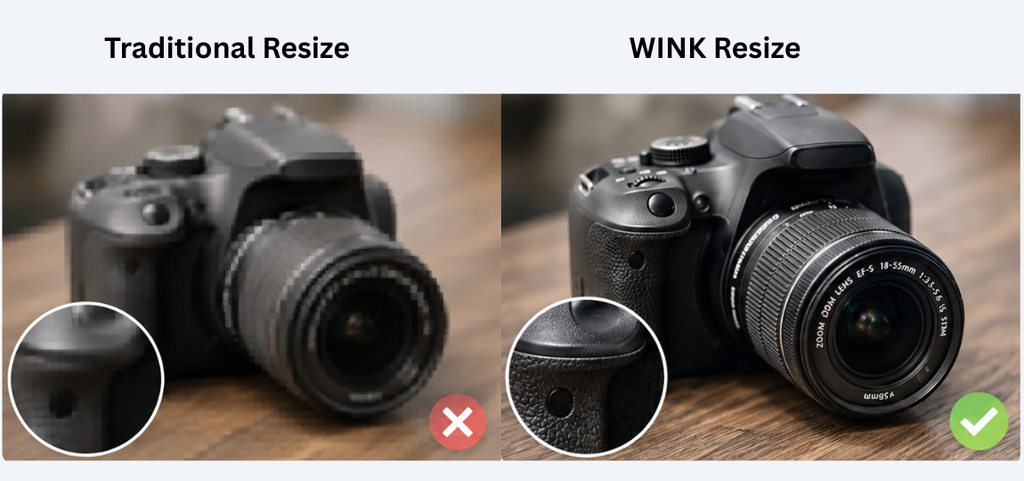
Also, it works quite simply: you upload your photo, select either 1080x, 2x, or 4x, and then just wait till it gets rebuilt.
Practical scale choices:
- 2x — enough for most social posts, inline blog images, and marketplace listings that need to go from ~800px to ~1600px
- 3x to 4x — better when you plan to crop heavily, print, or use the image as a wide banner where the theme will generate larger responsive sizes
Always preview at 100% on the part that sells the photo. For a product, that is the label and material texture. For a portrait, that is the eyes and hairline. For an interior, that is the lines where wall meets ceiling. If those areas look solid and not jagged, the enlargement is working.
Wink also allows batch enlargement, which helps when you have a set from the same source — 20 products shot at the same place, a series of team headshots under the same light. Running them together with one consistent setting keeps the whole set looking like it belongs together.
How to avoid the over-processed look
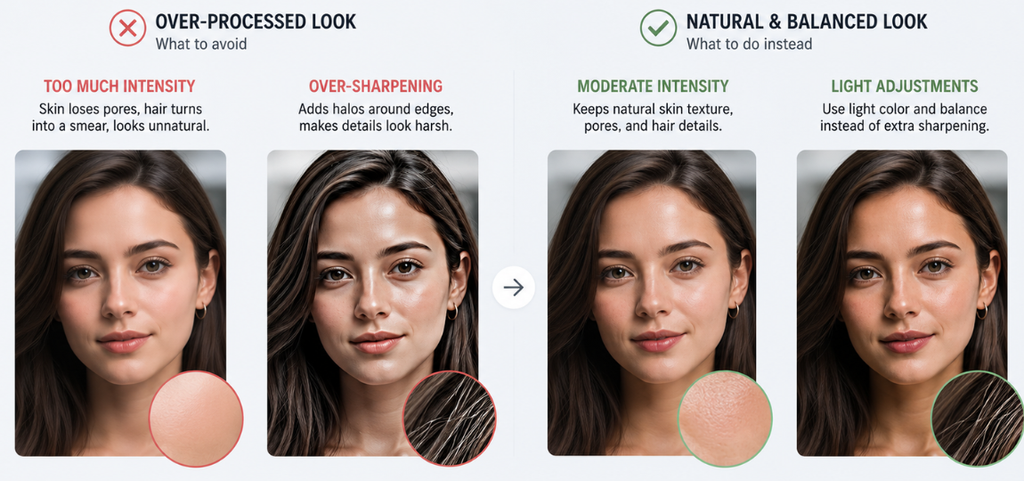
Two mistakes make enlarged photos look obviously AI-processed.
The first is pushing intensity too high on people. Skin loses texture, hair turns into a single smear, the whole photo looks filtered. For a larger, clearer version that still looks like the original, stay conservative. Keep a bit of natural grain.
The second is sharpening again after upscaling. The upscaler already includes edge reconstruction. Adding another sharpen filter in a different app creates bright halos around letters and makes faces harsh. If you need a bit more pop for web, do a light color and light balance instead, not extra sharpness.
A simple order that works every time
For anyone turning small files into usable large files regularly, this order prevents rework:
- Start with the best original you have, not a screenshot of it
- Remove any watermarks, stamps, or leftover text at original size
- Upscale with the right intensity for the subject — lower for people, higher for objects and text
- Do a very light balance for color and noise only if needed, then export for web
If the source is completely out of focus — not just small, but with no edge to recover at all — skip it. No tool can invent a face or label that was never captured. If the file is just small, compressed, or soft, don’t toss it yet. It may be soft from being saved over and over. Clean it up first. Then rebuild the size, and that very same photo will become something that you can print, and it works for large screens as well.
That is the whole idea behind making small photos larger: not to make them look like they were shot differently, but to give the detail that is already there enough room to be seen clearly.