ROG Ryujin II 360 Review — significantly better!
-
Appearance - 9.2/10
9.2/10
-
Features - 8.7/10
8.7/10
-
Materials - 8.8/10
8.8/10
-
Performance - 9/10
9/10
-
User Experience - 8.8/10
8.8/10
-
Value - 7.7/10
7.7/10
Summary
ASUS absolutely nails it in their second attempt at a premium AIO liquid cooler, as the ROG Ryujin II 360 is one awesome AIO liquid cooler!
Overall
8.7/10Pros
+ Thoughtful and neat packaging
+ Unmistakable ROG design language
+ Good LCD display quality
+ Significantly easier to cable manage now!
+ Included AIO Fan Controller lets you control your other PWM fans and ARGB accessories with Armoury Crate
+ Excellent performance at tolerable noise levels
+ Armoury Crate is nice and easy to use
+ AIDA64 integration is awesome!
Cons
– AIO Fan Controller is not magnetic
When ASUS sent us the original ROG Ryujin 240, it was slightly underwhelming. Performance was not spectacular for its price, the OLED display’s customizability was limited in a number of ways, but it did have its perks, like a VRM cooling fan to keep your toasty VRMs cool and it also had a really fancy design. Now, the ROG Ryujin II comes back with a larger LCD display and it is based on the newer Asetek Gen 7 technology. We received the 360mm version, so obviously performance isn’t directly comparable, but we do have other 360mm AIOs to compare it against. So, let’s see if the ROG Ryujin II 360 is a better cooler this time around.
Unboxing
The ROG Ryujin II 360’s packaging is quite basic, reminding us of their motherboards. A clean front with a pretty detailed rear listing out of all the features is typical of ASUS’ packaging.
Here’s your customary “Welcome to the Republic of Gamers” message…
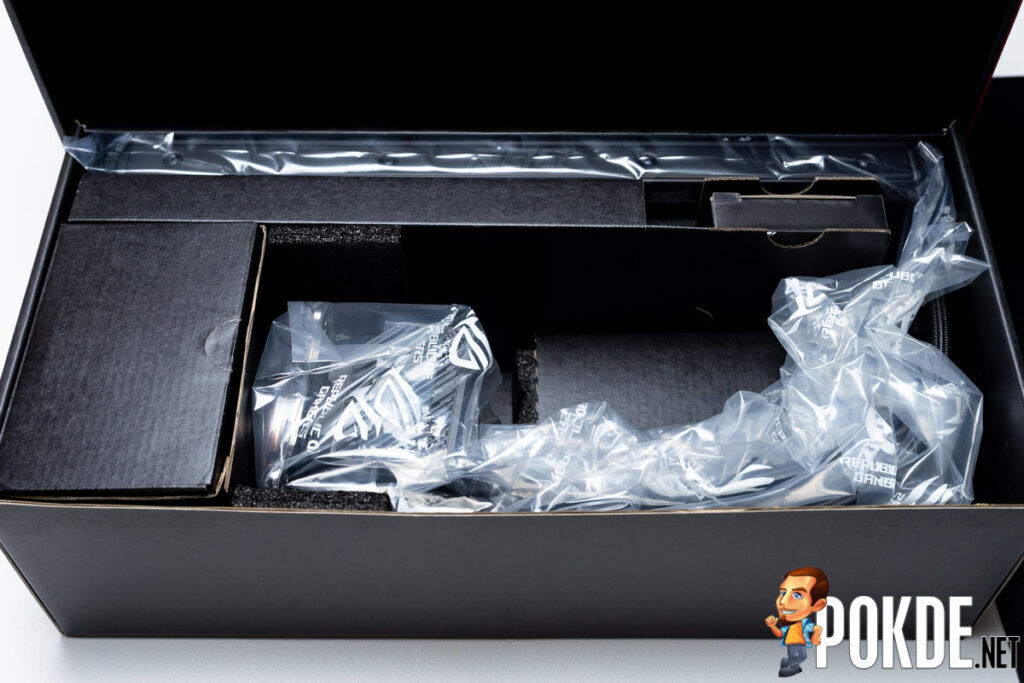
And this is the inside of the box. Unlike most AIOs which have their accessories in a plastic bag somewhere in the box, ASUS has clearly paid some attention to the arrangement of the contents.
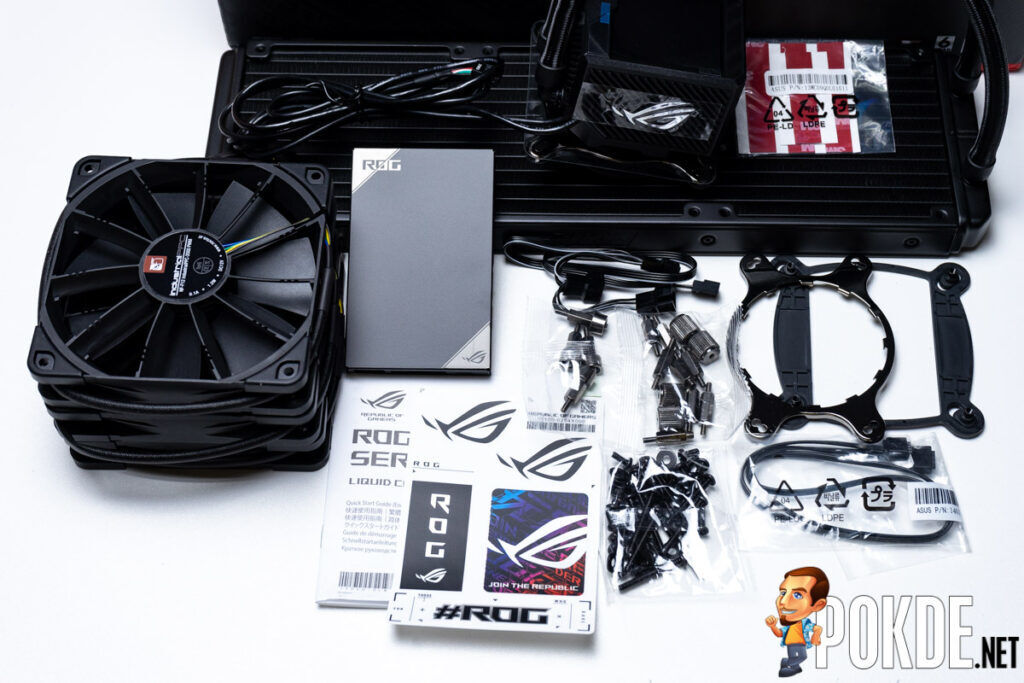
Packed away into the various compartments around the AIO itself are the three fans, the full array of mounting hardware to get the ROG Ryujin II 360 onto any recent processor, even the humongous AMD Ryzen Threadrippers. There are also a separate AIO Fan Controller, which we will get into more detail shortly.
Appearance
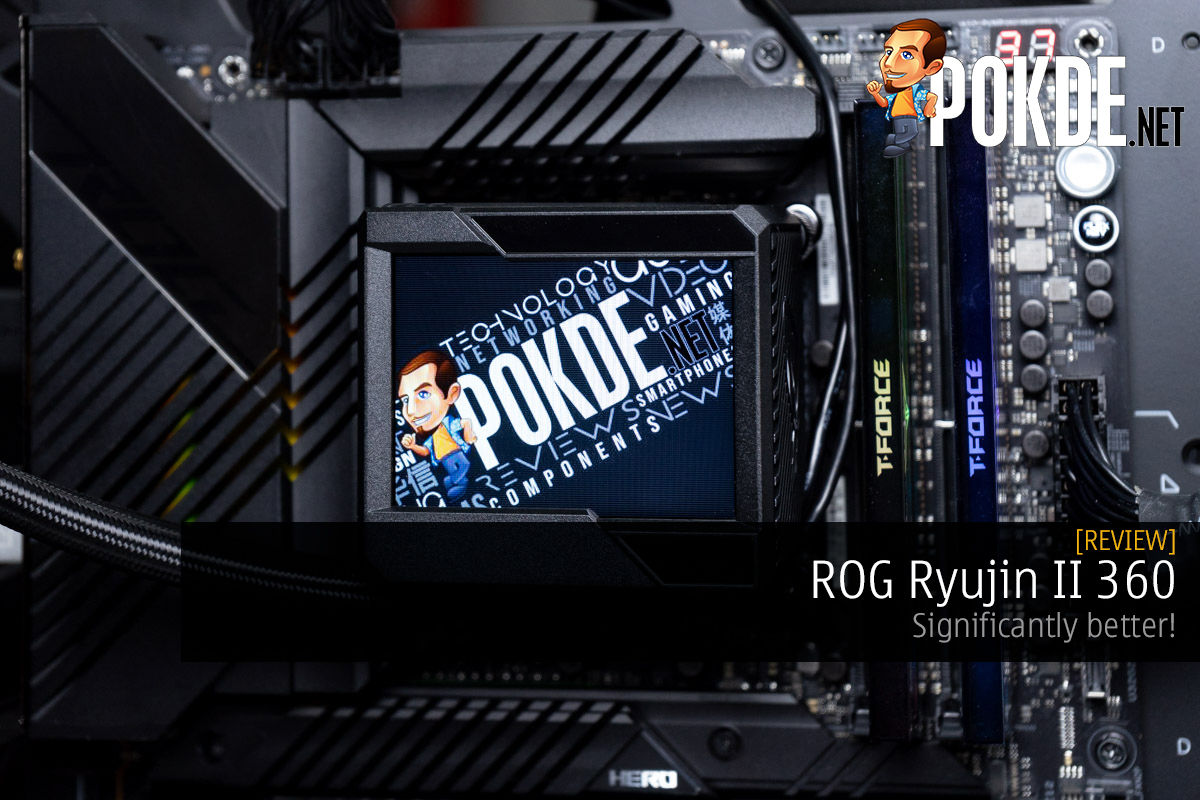
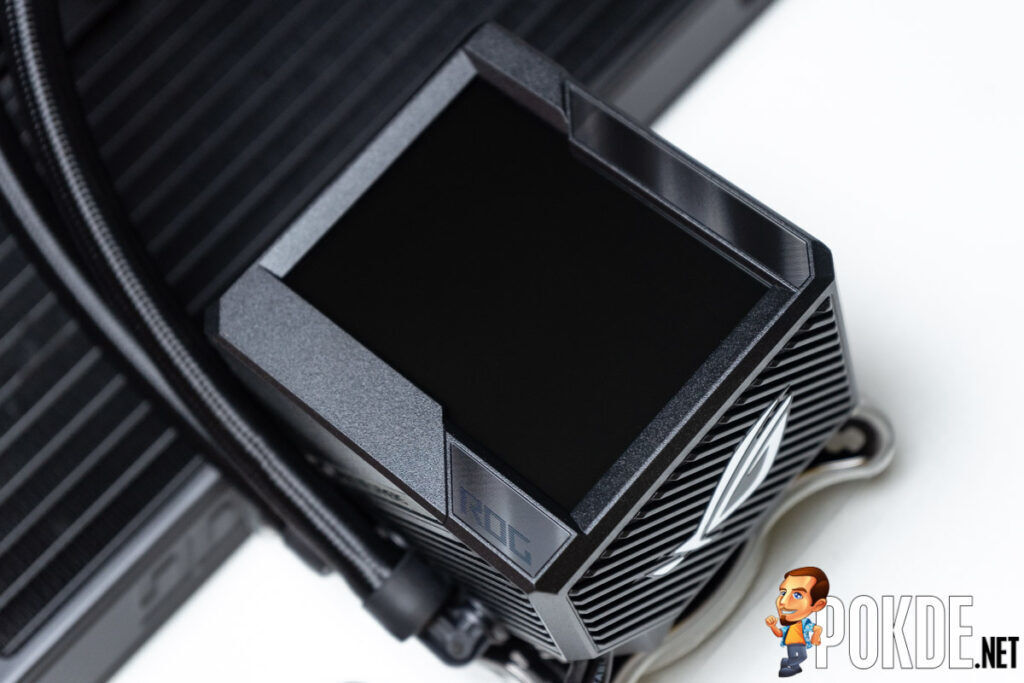
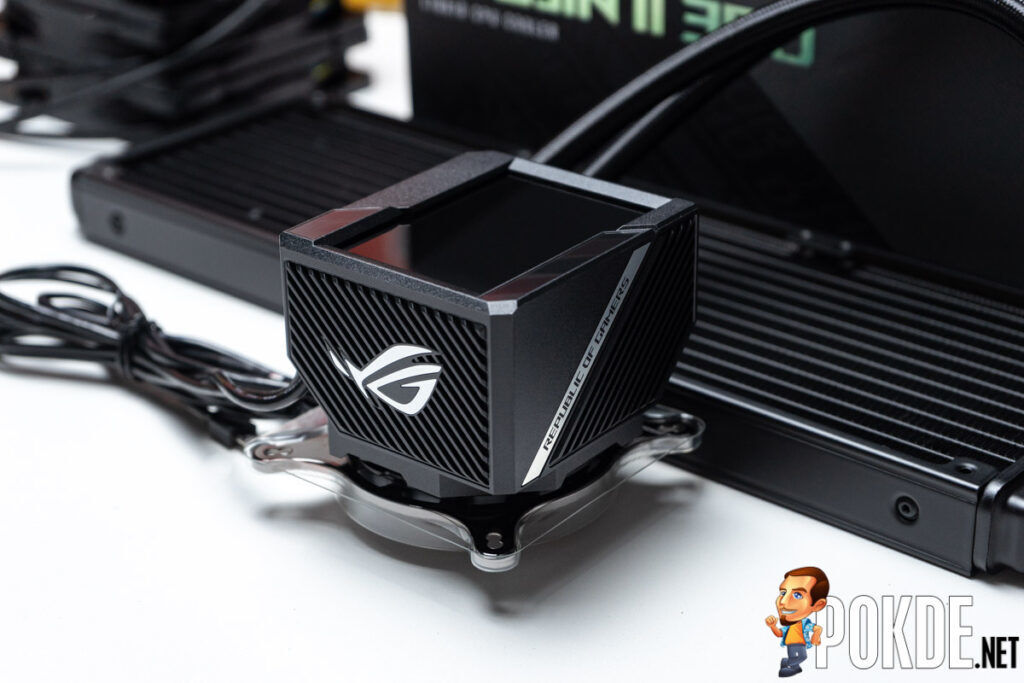
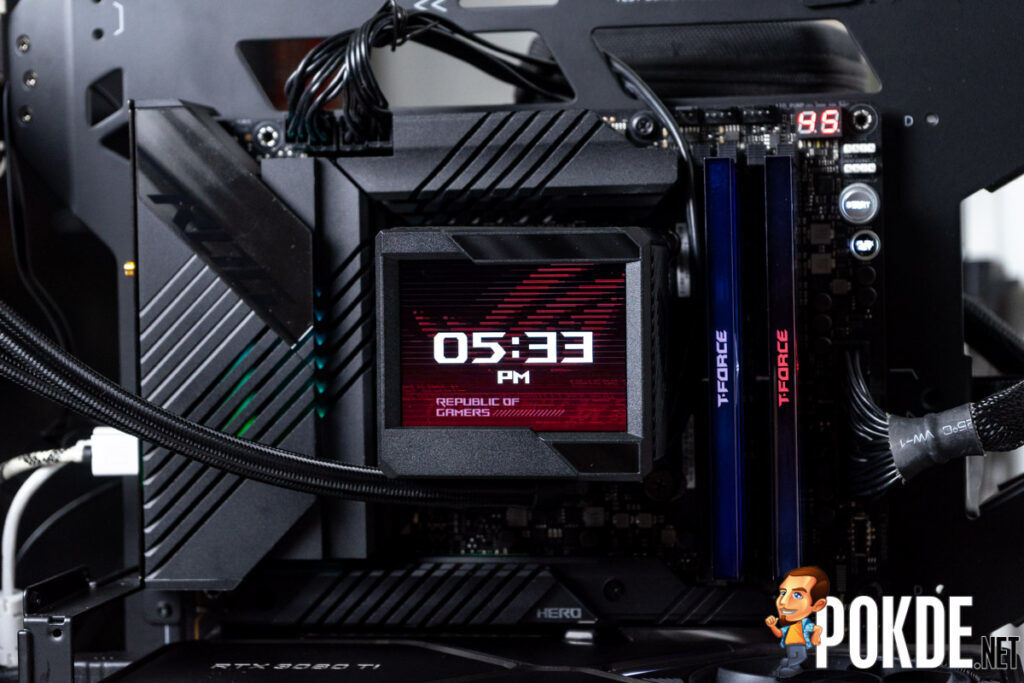
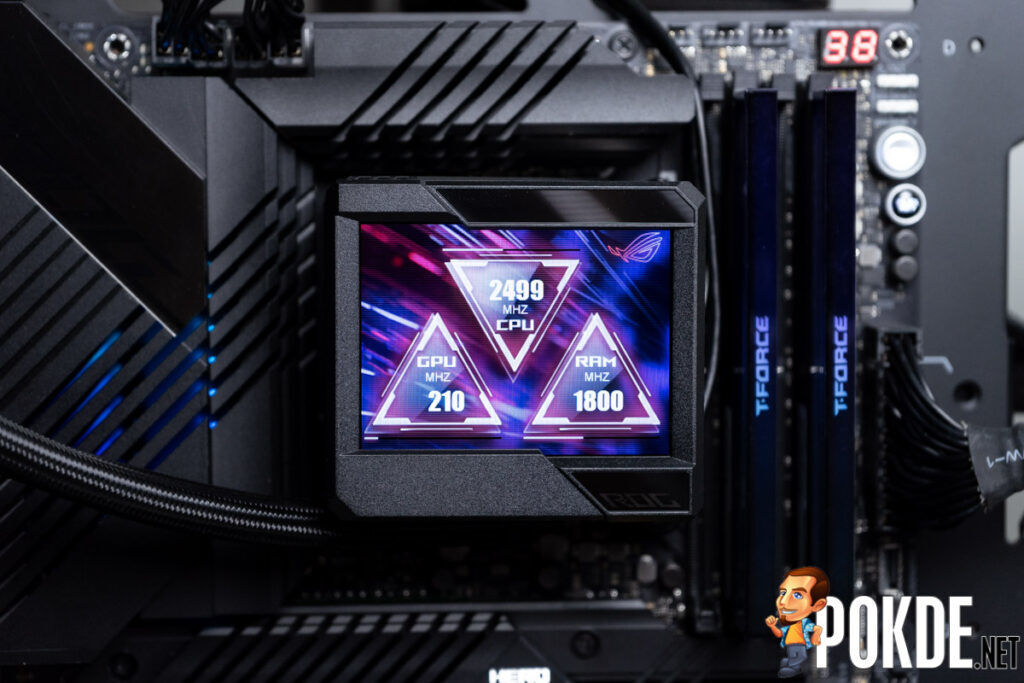
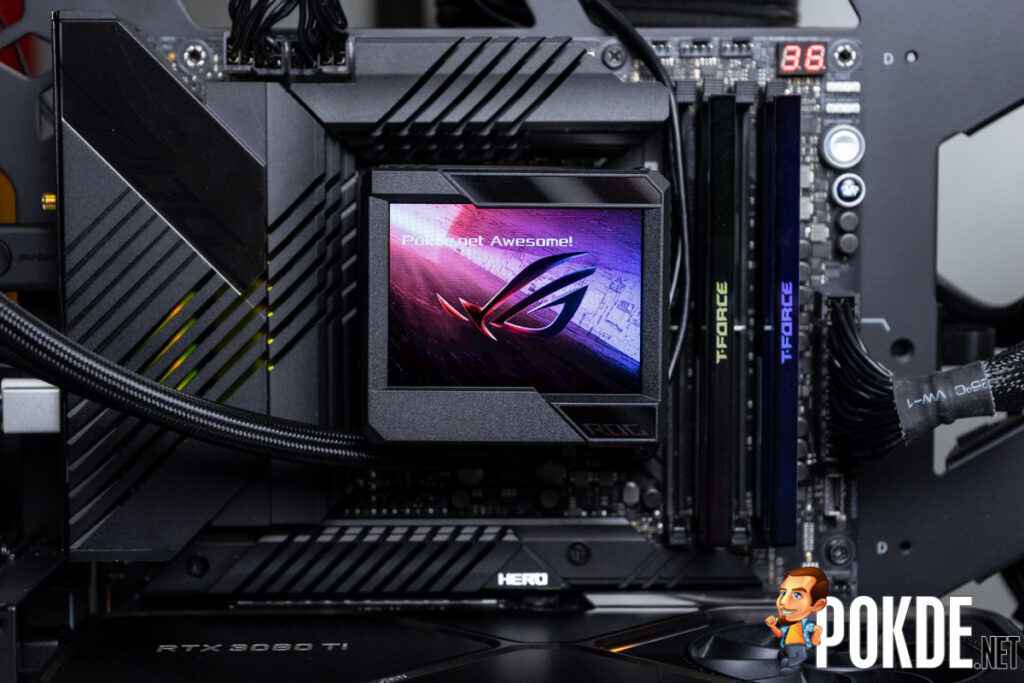
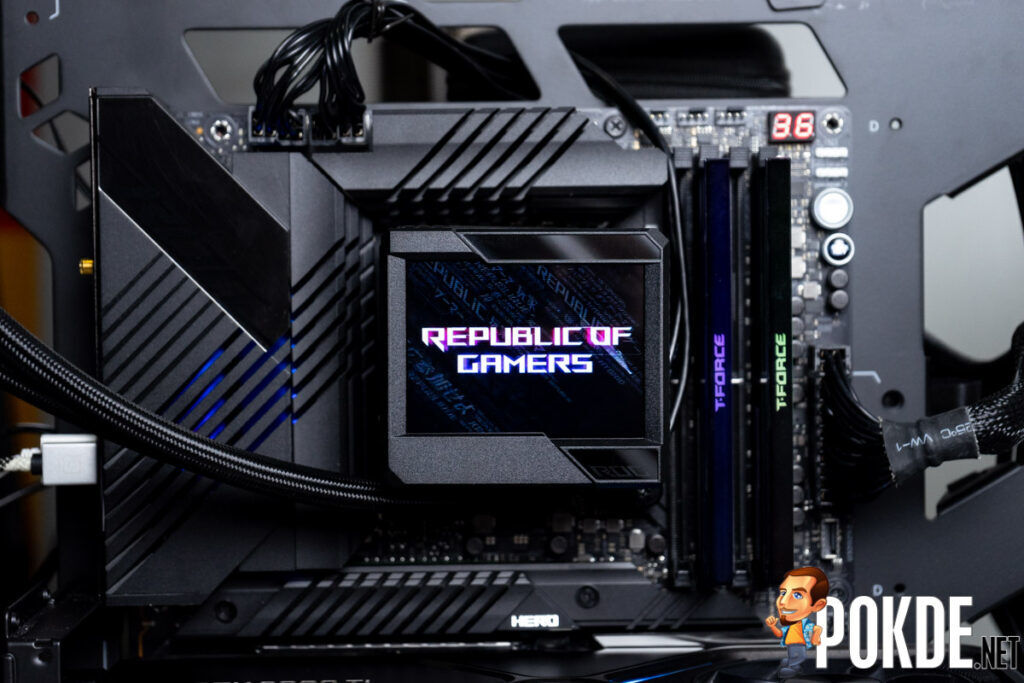
The pump block looks absolutely amazing now, with a much larger screen, with a nice mix of reflective and matte finish on the bezels. ASUS used the same finish here as they did on the ROG Maximus XIII Hero, which makes it a perfect match for the board.
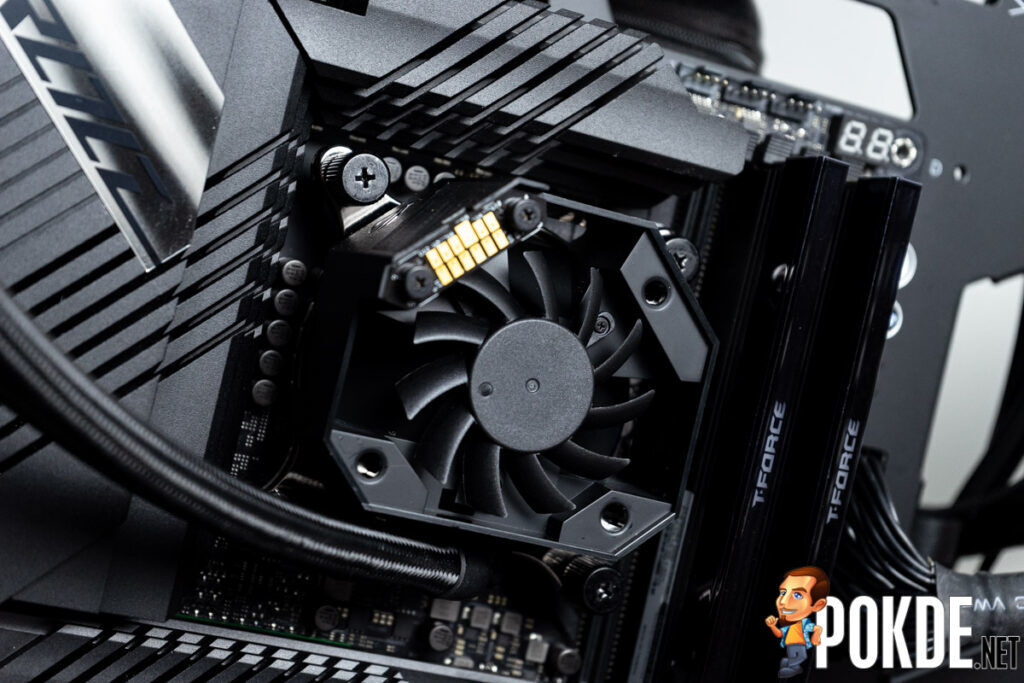
The sides of the pump feature the ROG logo set in the diagonal vent-like pattern. They serve as the intakes for the fan underneath, which is quite well hidden this time around. On the top and bottom we get the Republic of Gamers text running diagonally. You will most probably see very little of these sides when you have the ROG Ryujin II 360 installed in your system though, but it’s still nice to know that ASUS paid this much attention to detail here.
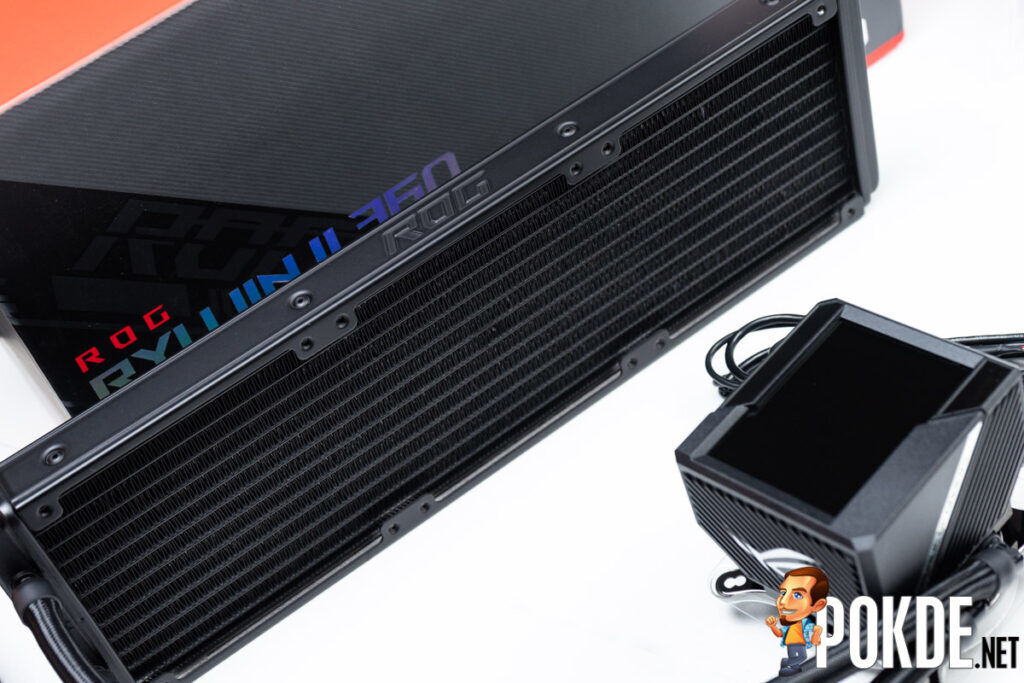
The radiator is pretty standard, with all the necessary holes for you to mount three 120mm fans. The side of the radiator gets the ROG text stamped into it, although I would probably have preferred the ROG eye emblem here instead.
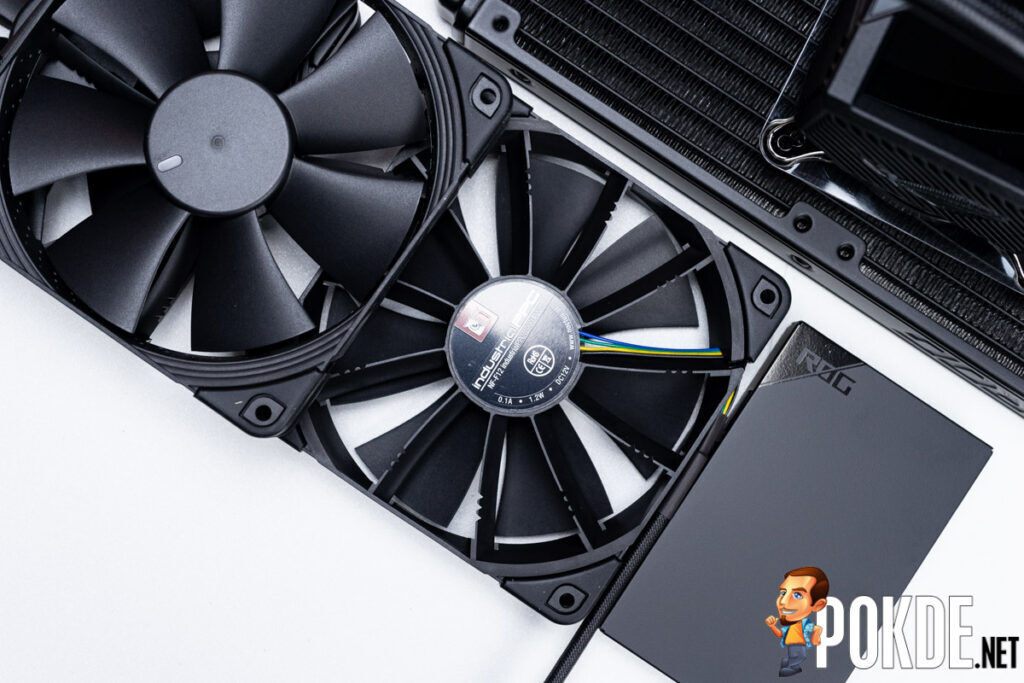
And here we have the Noctua NF-F12 industrialPPC-2000 PWM fans. These are the same fans that ASUS bundled with the first-gen ROG Ryujin as well, and they look pretty good with the fully-blacked out aesthetics. Too bad that ASUS couldn’t get Noctua to make them black NF-A12x25 fans though, as those would probably be even better performing. There’s no RGB on the fans here, with the only bit of color being the cables that are in blue, green, yellow and black.
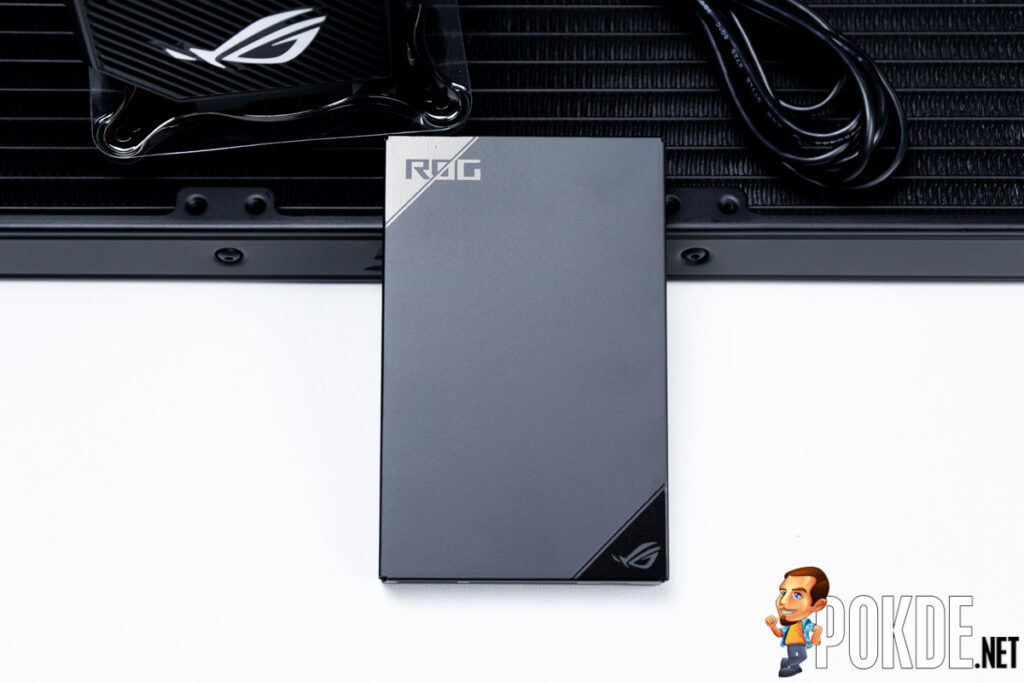
Instead of cramming all the controllers into the pump block unit, the ROG Ryujin II 360 comes with a separate AIO Fan Controller that has both connections for both fans and ARGB. It also looks like a deck of cards for some reason. It is finished in matte black, with glossy chromed corners which add a touch of contrast. I think that you will most probably hide this behind the motherboard, but as usual, the Republic of Gamers’ attention to detail is just immaculate.
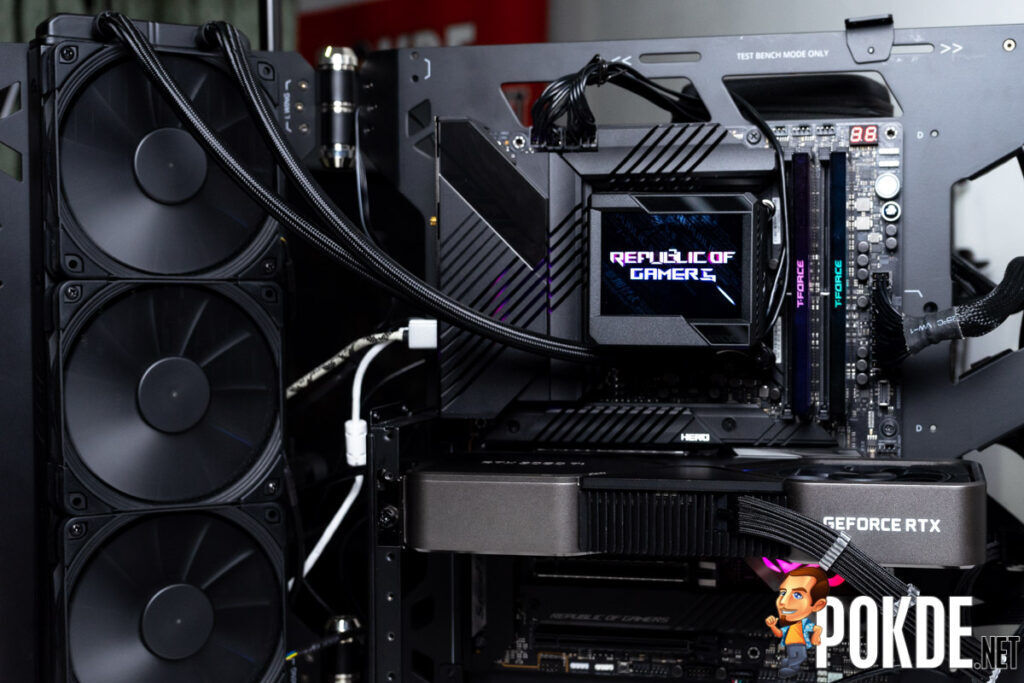
There’s no RGB to speak of on the ROG Ryujin II 360, with it being a nearly all-black setup aside from the 3.5″ LCD on the pump block. You might also notice that the cables coming out of the pump is significantly easier to manage now, with just two cables: one to the motherboard and one to the AIO Fan Controller. There aren’t many orientations that you can install the ROG Ryujin II 360 in without messing up the looks, but the ROG Ryujin II 360’s pump block is slightly smaller than its predecessor, which should allow it to fit onto more motherboards, even tighter ITX ones.
The LCD is a significant upgrade from the tiny 1.77″ OLED panel on the first-gen ROG Ryujin. It is double in size, and it looks downright amazing. You also don’t have to worry about burn in when displaying a static image or repeating animation, as LCDs are a lot more resilient. I would also like to see a few ARGB accents along the sides, but I guess ASUS wanted to keep the focus on the screen here.
Specifications
ROG Ryujin II 360
| CPU socket compatibility | Intel LGA1156 ~ LGA1151 / LGA 2011 ~ LGA2066 AMD AM2 ~ AM4 / FM1 ~ FM2+ / TR4 ~ sTRX4 (with mounting bracket included with the CPU) |
|
| Radiator dimensions | 394 x 121 x 27 mm | |
| Fan(s) | Size | 120 x 120 x 25 mm |
| Quantity | 3 | |
| Speed | 450 ~ 2000 rpm | |
| Airflow | 71.6CFM (max) | |
| Air pressure | 3.94mmH2O (max) | |
| MTTF | >150 000 hours | |
| Noise | 29.7dBA (max) | |
| Pump | Size | 78.15 x 87.5 x 81 mm |
| Type | 7th Gen Asetek Pump | |
| Embedded Fan | 60mm fan, 4800RPM 3.23 mmH2O, 19.41CFM |
|
| Display | 3.5″ LCD, 320 x 240 | |
| Speed | 800 ~ 2800 rpm | |
| MTTF | N/A | |
| Noise | Embedded fan: 31dBA Pump: N/A |
|
| Included accessories | AIO Fan Controller, stickers, M.2 double-sided tape, fan splitter, ARGB extension, user manual, a lot of mounting screws | |
| Warranty | 6 years | |
Test System
| CPU | Intel Core i5-11600K, 4.9GHz all-core @ 1.43V |
| CPU Cooler | ROG Ryujin II 360 |
| Motherboard | GIGABYTE AORUS Z490 MASTER |
| GPU | NVIDIA GeForce RTX 3060 Ti Founders Edition |
| Memory | 2 x 8GB KLEVV Bolt XR DDR4-3600 CL18 |
| Storage | Plextor M9PeY 512GB |
| Power Supply | Cooler Master V850 |
| Case | MasterFrame 700 |
Testing Methodology
Our Intel Core i5-11600K will be clocked at 4.9GHz, with a Vcore of 1.43V set in the BIOS. The thermal paste of choice will be the MasterGel Maker, sponsored by Cooler Master. To test the performance of CPU coolers, we run Realbench, with the “Up to 8GB RAM” setting for 30 minutes. This results in a power draw averaging 227W. The fans (and pumps, if available) will run at maximum speed to gauge maximal performance. Ambient temperatures are fixed to 25°C, in an air-conditioned room. The temperature measured by HWiNFO will be recorded. Noise levels are recorded approximately 30cm away from the test system.
Installation
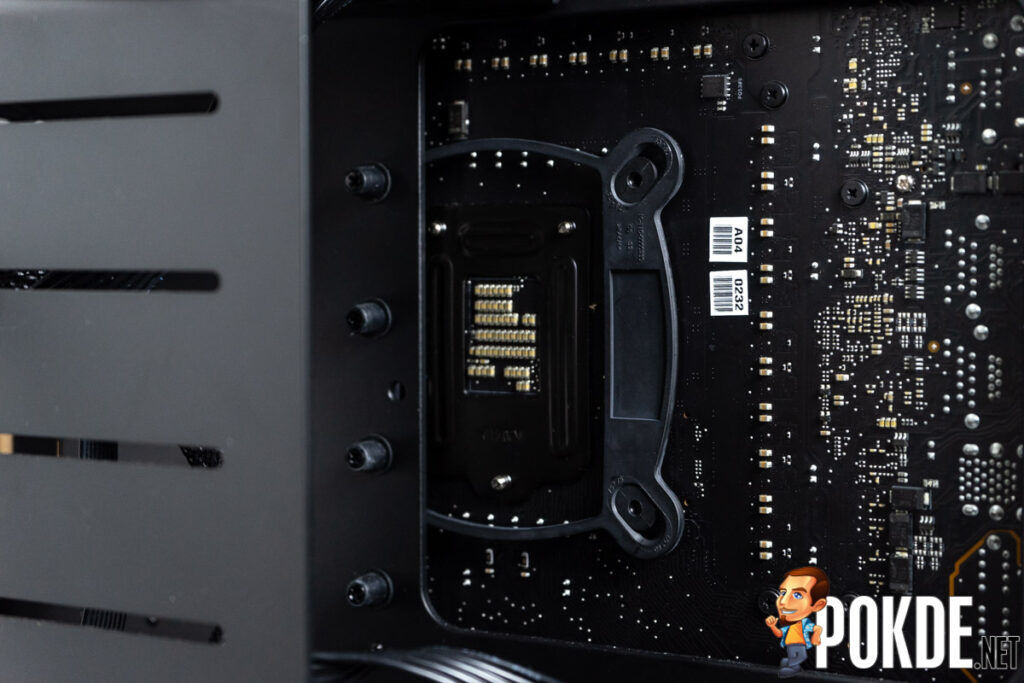
As the ROG Ryujin II 360 is a design based on the Asetek Gen 7 platform, the mounting is similar to many other coolers out there. For Intel, you get a flexible plastic backplate with metal mounting points that connect to the standoffs in the front. If you are an AMD user, you will first need to switch out the mounting bracket on the pump block itself to the AMD one, and also use the metal backplate that’s included with your motherboard to screw standoffs into.
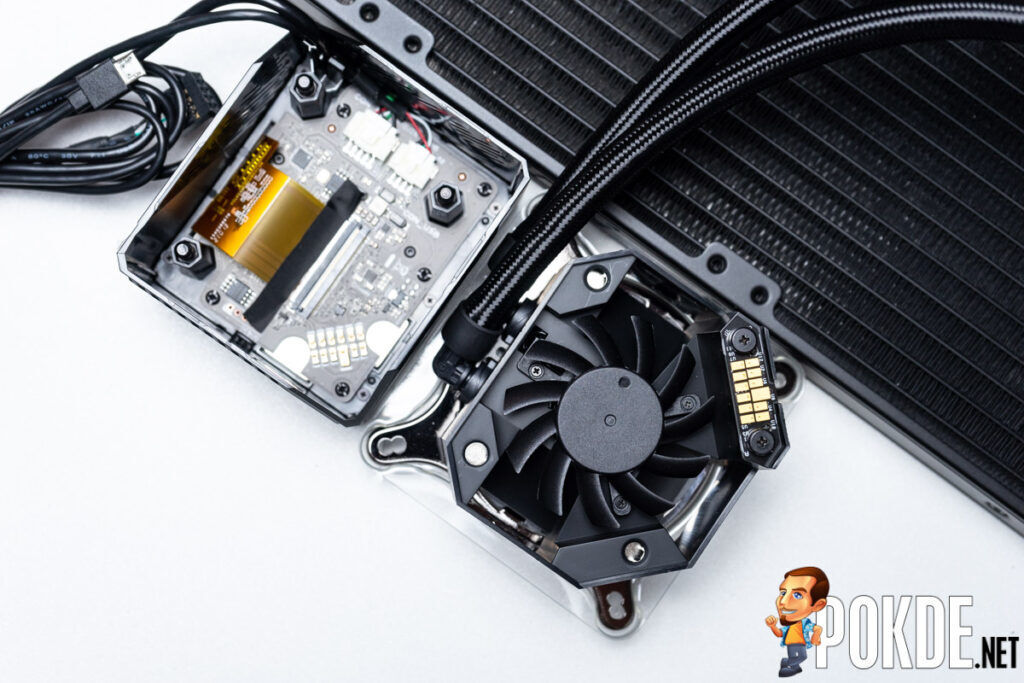
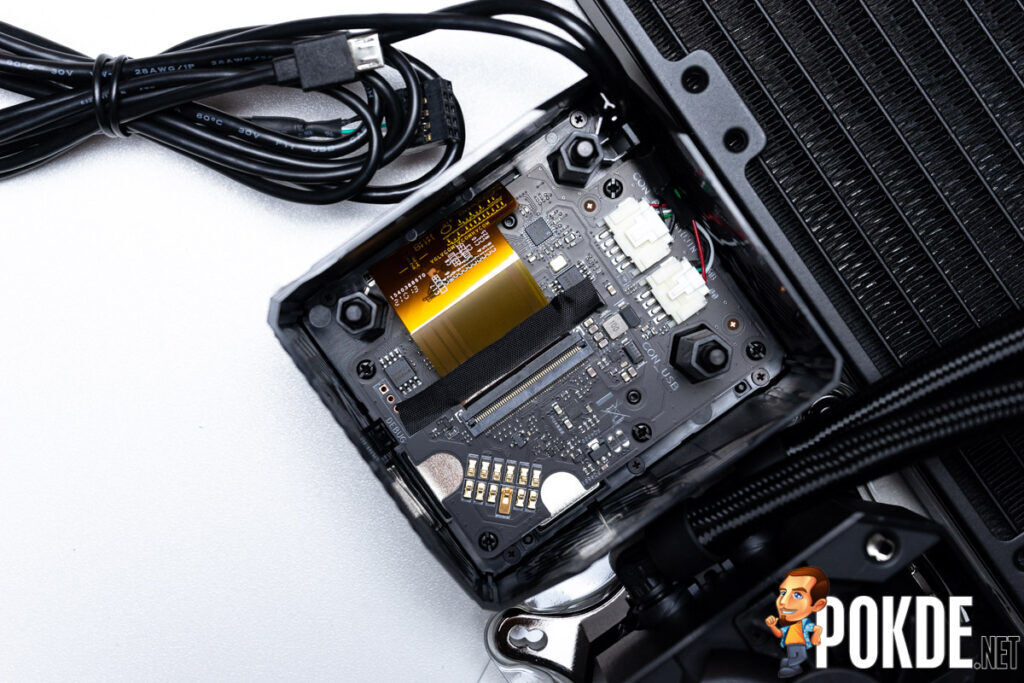
To mount the pump block onto the standoffs, you will first need to remove the top cover of the block to expose the mounting points. Unlike previous generations, the cables are all connected to the cover, so you don’t need to worry about the cables getting in the way of your screwing. Another quality-of-life improvement that ASUS baked into the ROG Ryujin II 360 is a tighter magnetic mount. ASUS has made the lower half of the block solely for cooling, with the embedded fan and pump getting their power through these pads. The top half is where the connections are running into, and you also get the LCD’s circuitry up there.
Due to this design, ASUS has to make sure that the top half is securely attached so that your pump and embedded fan gets a proper connection. The magnets are extremely strong and feature these long standoffs that go right into their sockets on the lower half.
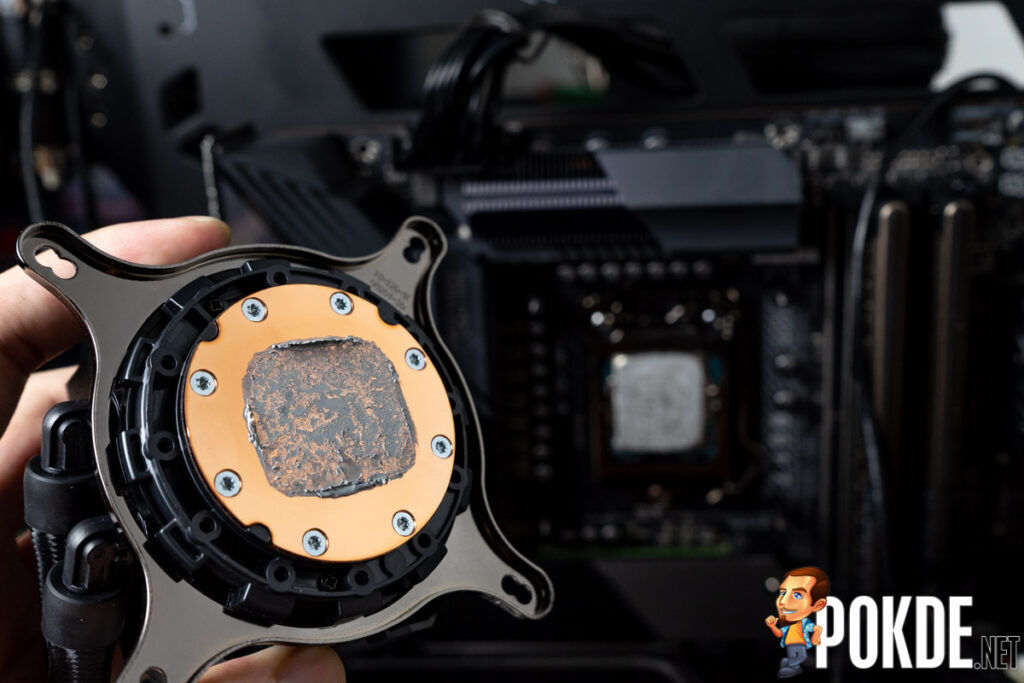
The standoffs screw into the backplate on one end, and then you put the cooler on and tighten down the screws. The installation is extremely simple, and I have no complaints here. ASUS even pre-applied thermal paste onto the cooler, making the initial installation process even easier.
The pre-applied thermal paste is more than sufficient to cover our 11th Gen Intel Core i5-11600K, and I do believe it should suffice even if you have a larger HEDT processor. The AMD Threadrippers might need some extra thermal paste, but maybe just a tiny bit. Now let’s move on to the AIO Fan Controller.
Oddly enough, the AIO Fan Controller actually comes with ARGB connections, when the entire system does not have any ARGB. I guess ASUS just wanted to be ready to provide additional ARGB headers in case you want to replace the fans with ARGB ones down the line. Another oddity is the way that you have three fan connectors on one side, and three ARGB connectors on the other. I think four on each side would be better? But maybe three on each side makes for simpler cable management.
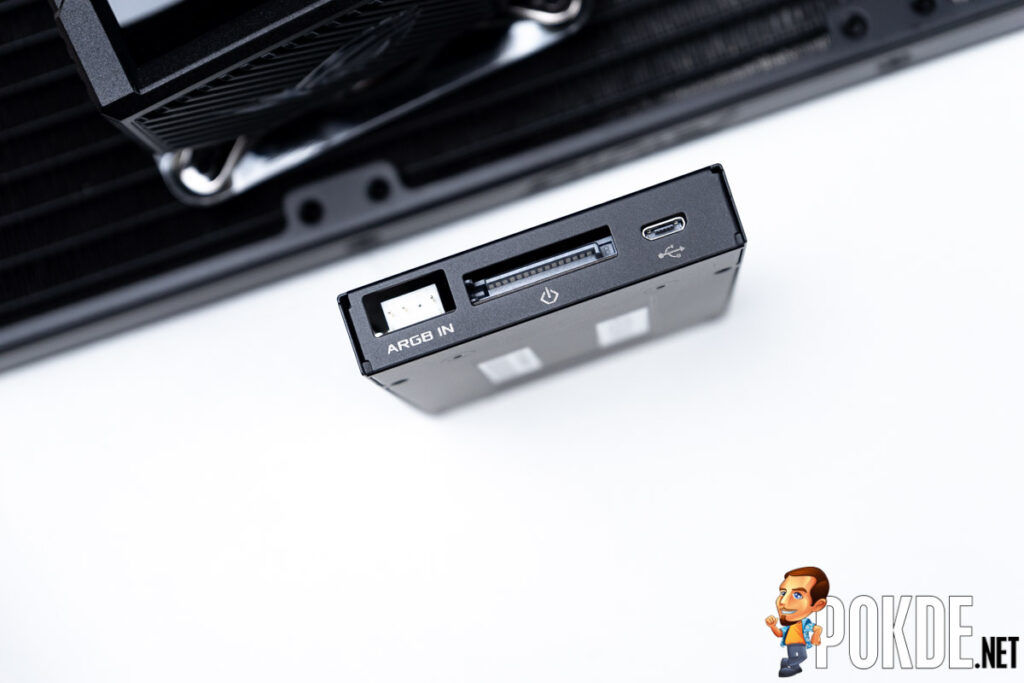
On the bottom side you get the SATA power, microUSB port which connects to the AIO pump block and the ARGB input port. Overall, this made the ROG Ryujin II 360 much easier to install and cable manage, since you don’t have to deal with that many cables heading to the pump block itself. All you have is one USB header that connects to the motherboard from the pump block, and another microUSB cable that connects to this AIO Fan Controller. A very neat arrangement and I really appreciate that ASUS managed to come up with this solution.
One thing I hope that ASUS improves with the AIO Fan Controller is to add magnets inside for easier mounting. Currently, ASUS expects you to use the included double-sided tape to attach the controller, which is decent, but it also means that you will have to really plan ahead before installing the ROG Ryujin II 360 in your system.
Performance
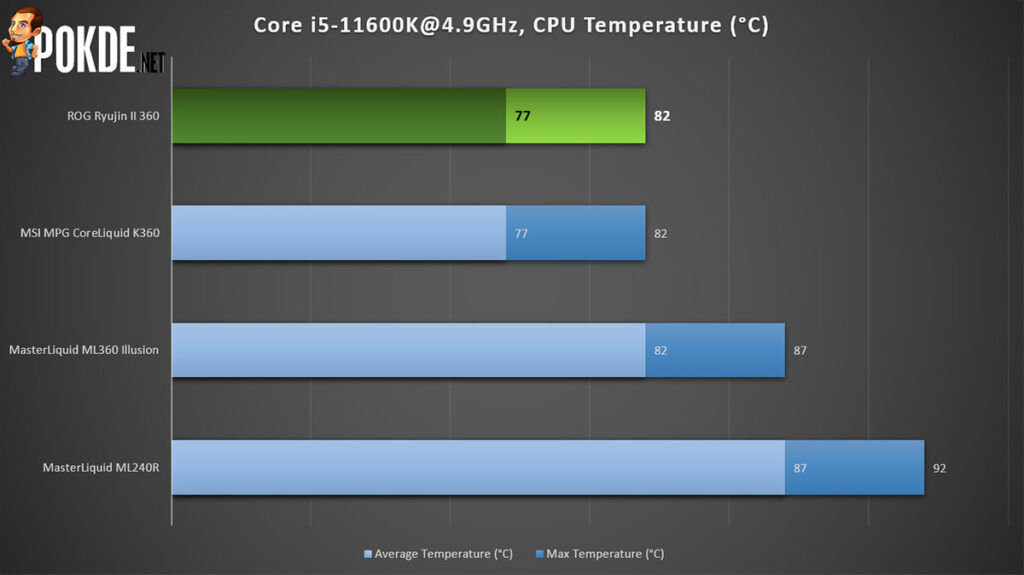
The ROG Ryujin II 360 ties our MSI MPG CoreLiquid K360, which isn’t all that surprising considering that both are based on Asetek Gen 7 designs. It keeps our CPU below 82°C at all times in our 30-minute Realbench stress test, which is excellent. The pre-applied thermal paste on the ROG Ryujin II 360 is also very good, matching the temperatures we got with our application of MasterGel Maker. On top of all that, this is also the best performing cooler in this stack, which is even more interesting once you see the next chart.
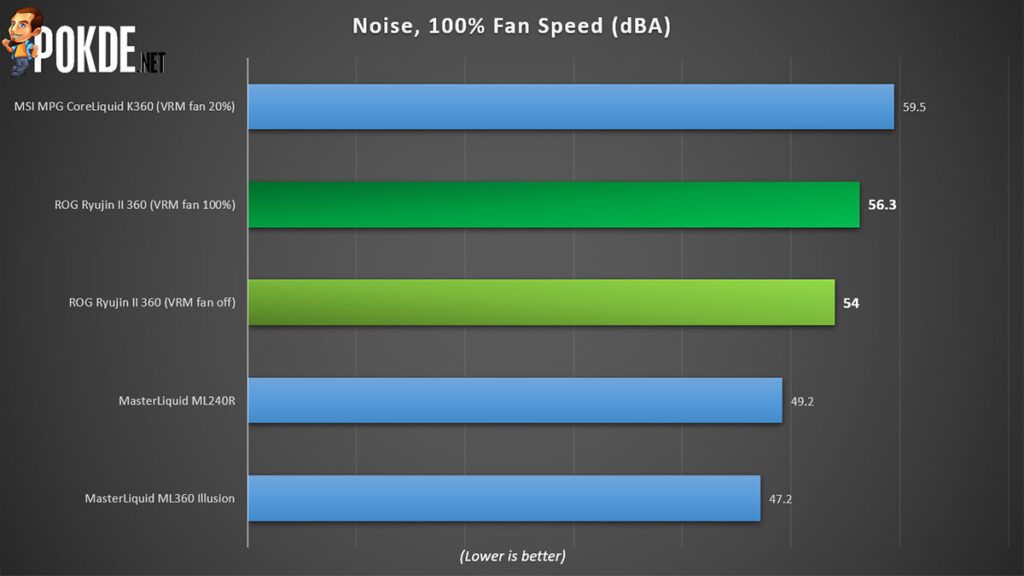
At 100% fan speed, the ROG Ryujin II 360 is audible, but the lower pitch of the noise makes it more bearable. But when compared against the similarly performing MSI MPG CoreLiquid K360, the ROG Ryujin II 360 is significantly quieter. It seems that their partnership with Noctua really pays off, with the fans delivering excellent performance while still being rather quiet.
As the ROG Ryujin II 360 has an embedded fan on its pump block for VRM cooling, we also tested it at 100%. As usual for small fans, they are quite loud, and the higher pitch is also quite annoying. The good news however is that the keeping the fan below 70% doesn’t really add to the noise, and the auto fan curve for the embedded fan usually keeps it below 70%. So yeah, it’s all good.
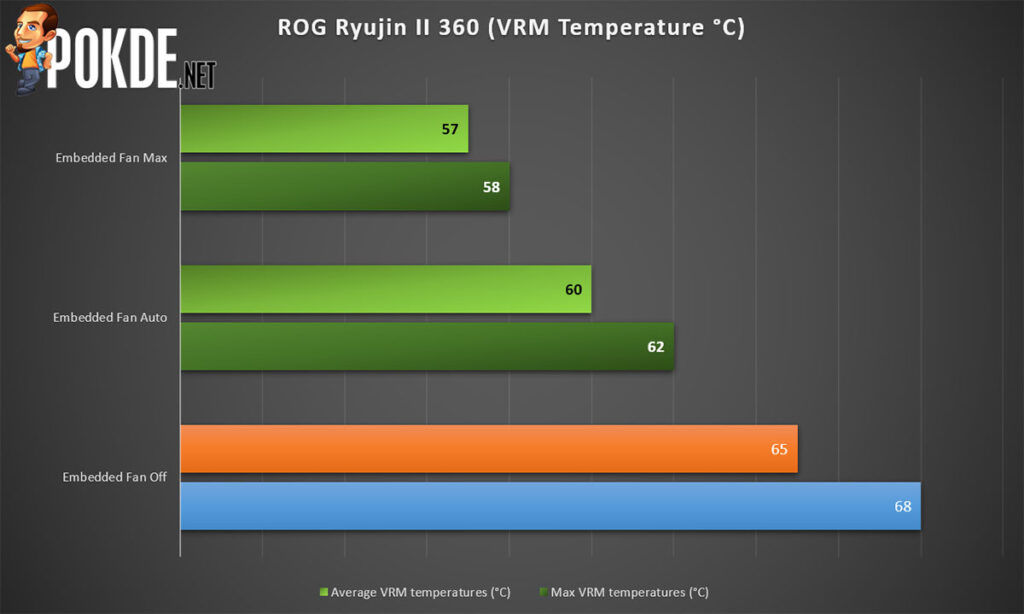
Most of the premium motherboards that you would pair the ROG Ryujin II 360 with will most probably not need any additional airflow over the VRMs. Our AORUS Z490 MASTER is no different, but it doesn’t mean that it doesn’t benefit from it. The VRM temperatures dropped by a good 6°C by just leaving the fan at the inaudible auto setting, and up to a whopping 10°C when we set the fan to its maximum speed. I wouldn’t recommend keeping it at maximum RPM though, as it sounds quite annoying at this setting.
User Experience
Display Customization
I believe that the biggest improvement in the overall user experience coming from the original ROG Ryujin is that you no longer need three separate software to manage all the settings on the ROG Ryujin II 360. Now with the ROG Ryujin II 360, all you need is Armoury Crate, which lets you play around with the display contents quite easily. ASUS has clearly worked a lot on their software support, with the ROG Ryujin II 360 now being much less picky when it comes to the GIFs that you can use on the panel. You can even create slideshows of up to five animations/images here if you want!
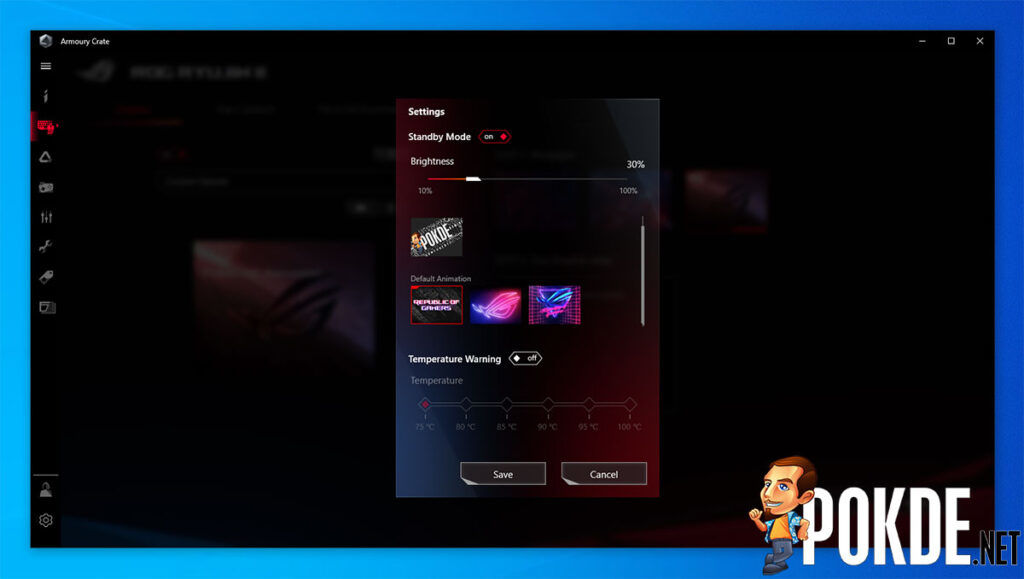
There’s are also other customization options, including what to show on the display of the ROG Ryujin II 360 when your system is off. By default it will show the… well, default animation, but you can also change it to your own custom image or GIF animation. You can’t set it to show the time though, which is quite peculiar.
There’s also official AIDA64 support, which is fully customizable, if you are up for it. ASUS was kind enough to throw in a free copy of AIDA64 Extreme, and it comes with four preset layouts.
Of course, if you are into full customization, these four presets are definitely not going to cut it. The full customization options are available to you if you want to as well, and it’s nice to see that ASUS worked with AIDA64 to enable extensive customizability for your monitoring needs.
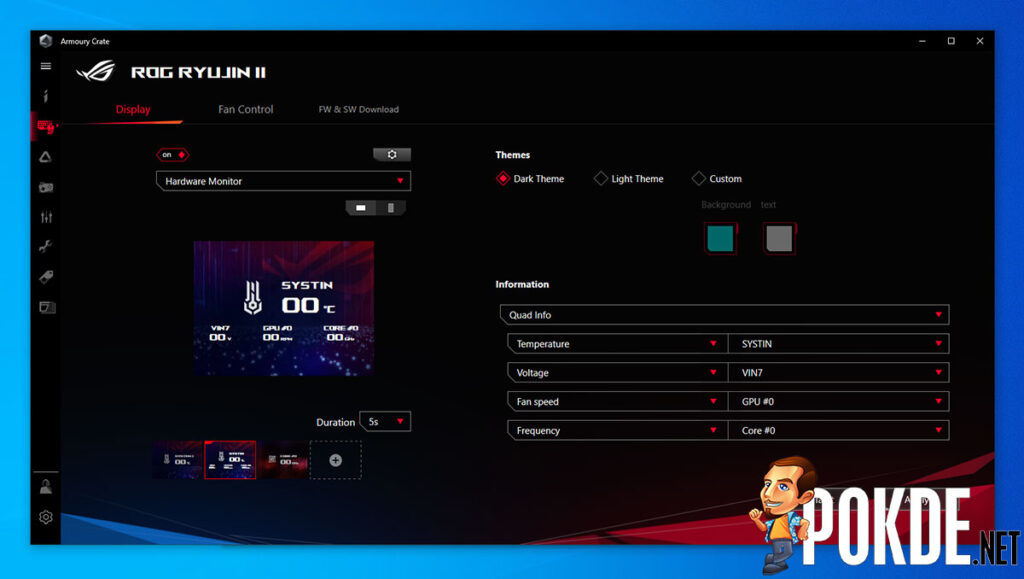
But I am not particularly a huge fan of this, and I prefer the monitoring options in Armoury Crate, which is already very detailed, with the ability to show up to four stats per page, and you also have the ability to create five slides here. What I hope will be added is the ability to change the background to your preferred image or animation. Right now, ASUS only gives you the choice of either the Dark or Light theme. Alternatively, you can also pick a color for the font and the background, but that’s about it. I guess that’s why you should use AIDA64.
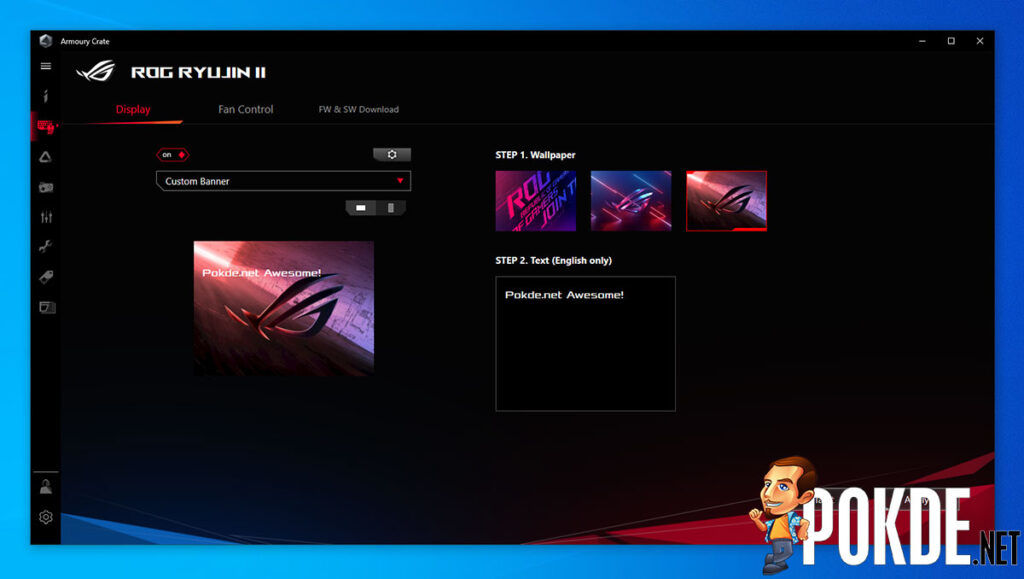
A much less useful option is the Custom Banner mode. This is quite limited right now, with only three different wallpapers to choose from and you only get one choice of font and font size for the text. If you are only using short messages, they look extremely awkward. I am definitely looking forward to ASUS expanding on this.
Fan Control
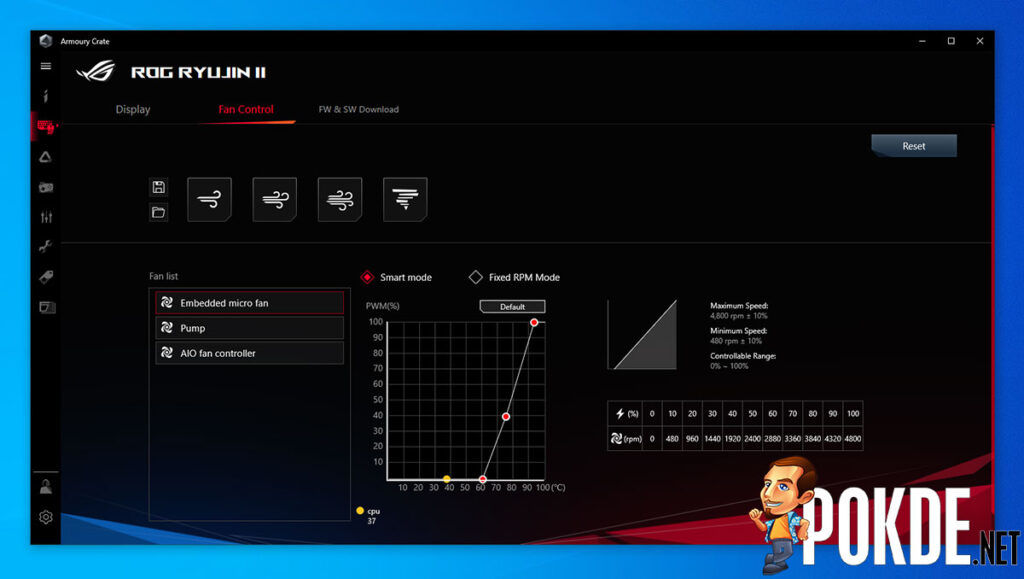
Now the ROG Ryujin II 360 has three things that you can control the speed of: the radiator fans, the embedded fan in the pump block, and the pump itself. There are four presets, and you can also create your own with both the Smart Mode which lets you create a three-step PWM curve, and a fixed RPM mode that I used for the tests, as I needed the fan and pump to be at full speed.
Overall I do really like the software experience in Armoury Crate when it comes to customizing the ROG Ryujin II 360, and I really think ASUS deserves a good number of cookies for their efforts to integrate everything into one software that works properly.
Conclusion
The ROG Ryujin II 360 is not cheap. At RM1399, it is one of the more expensive AIO liquid coolers out there. But it isn’t all that expensive, when you take into account the bundled Noctua fans which cost more than RM150 each. And there are three of them here! Then you have the great performance, beautiful LCD display and excellent software integration, including support for AIDA64, and it starts to look pretty good. You don’t often see me commending the value proposition on ROG products, but yeah, you do get a good deal with the ROG Ryujin II 360.
Not to mention that ASUS actually bundled an AIO Fan Controller that has ARGB controls, even though the ROG Ryujin II 360 doesn’t actually have any ARGB accents on it. If that’s not value, I don’t know what is. You no longer have to worry about having to use other software to manage your ARGB accessories even if you don’t own an ROG motherboard, as the AIO Fan Controller will take care of that.
My main concern with such a premium cooler is whether the ROG Ryujin II 360 will support the upcoming AMD AM5 and Intel LGA1700 sockets, because I would want to use this for more than just one generation of CPUs. I guess ASUS could easily ship you an Asetek retention kit to let you use the ROG Ryujin II 360 on the newer sockets, or you probably can source one elsewhere, since Asetek-based designs are quite ubiquitous, and it doesn’t look like Asetek is going to change their mounting system anytime soon. I sure hope ASUS has plans to support them with the ROG Ryujin II 360, as there has been rumors of the next-gen sockets using different cooler mounting points.

Our thanks to ASUS Malaysia for sending us the ROG Ryujin II 360 for review. You can check out the ROG Ryujin II 360 on Shopee via this affiliate link to support what we do here at Pokde.net.


